Friday, December 17, 2010

My new favorite Christmas treat

My cousin Lisa posted this recipe from allrecipes.com for Layered Peppermint Bark on her facebook the other day and I told her I wasn't going to make this because I have no self control when it comes this delicious stuff!!!  Well, I lied.  I ended up making this last night- ONLY to give to V's teachers for Christmas gifts.  Unfortunately, there is half the recipe left over and I have to look at it in my kitchen and tell myself no all the time.  Just because I tell myself no, doesn't mean I do what I tell myself!!  :)  Isn't that just terrible!! Now I am wondering who I can bring it to it's out of my house!

Anyway, thanks for letting me "confess" that.  Now I feel better! :)


Here are my girls with their chocolate Advent calendar!  Hannah asks for that chocolate all day- she doesn't understand that she only gets one a day!!  Now I wonder what we are going to after Christmas when it's all gone!

Hannah is talking to grandpa.  Isn't she just so cute!  :)


My little Diva!


Layered Peppermint Bark

Line a 9x12 inch baking pan with foil or parchment paper.


Melt half of the white chocolate in the top of a double boiler over just barely simmering water, stirring frequently and scraping down the sides with a rubber spatula to avoid scorching. 

Spread the white chocolate into the prepared pan.


Sprinkle 1/4 of the crushed peppermints evenly over the white chocolate.  Chill until firm, about 15 minutes.


Meanwhile, melt the dark chocolate, heavy cream and peppermint extract together in the top of a double boiler over just barely simmering water, stirring frequently, until just melted.  Quickly pour the chocolate layer over the chilled white chocolate layer; spread evenly.  Chill until firm, about 20 minutes.


Meanwhile, melt the remaining white chocolate layer.  Spread quickly over the chilled bark.  Sprinkle with the remaining peppermint pieces; chill until firm, about 20 minutes.  Cut or break into small pieces to serve!  Enjoy!!


Mmmmm.  Makes me want to go in the frig and get a piece.  "Sheri, do NOT do it!!!"


And with the leftover peppermint candy, give it to your kids to enjoy!!!


 Layered Peppermint Bark

20 oz. white chocolate, coarsly chopped, divided
30 peppermint candies, crushed, divided
10 oz. dark chocolate, coarsely chopped
6 T. heavy cream
1 t. peppermint extract

Line a 9x12 inch baking pan with aluminum foil or parchment paper. 
Melt 1/2 of the white chocolate in the top of a double boiler over just barely simmering water, stirring frequently and scraping down the sides with a rubber spatula to avoid scorching.  Spread the white chocolate into the prepared pan.  Sprinkle 1/4 of the crushed peppermints evenly over white chocolate.  Chill until firm, about 15 minutes.
Meanwhile, melt the dark chocolate, heavy cream and peppermint extract together in the top of a double boiler over just barely simmering water, stirring frequently, until just melted.  Quickly pour the chocolate layer over the chilled white chocolate layer; spread evenly.  Chill until firm, about 20 minutes.
Meanwhile, melt the remaining white chocolate in the top of a double boiler, stirring frequently, until just melted.  Spread quickly over the chilled bark.  Sprinkle with the remaining peppermint pieces; chill until firm, about 20 minutes.  Cut or bread into small pieces to serve.

This recipe is really easy to make and very delicious to eat.  I hope you enjoy it too!!


Wednesday, December 15, 2010

My oh my how time flies!!

I can't believe I haven't blogged in a couple weeks- it sure has been a busy couple weeks though!!  We were blessed with family visiting us last week- they were our first visitors since we moved here!  Very exciting for us.  I had these great plans of blogging about Christmas baking, asking you what you loved to bake for the Christmas season and as you can see- I'm a little late in doing that!  Oh well, all that matters is that I am doing in now. 
So, what is your favorite thing to bake/eat during the Christmas season?  Do you get into the baking or do you just like to eat it?  :)  I used to bake tons during Christmas.  Since I LOVE to bake, for me, it was an excuse to be able to make huge amounts of cookies/bars!  Then I would send it to my dear husband's work for the Christmas party and usually it was eaten up.  My highest was 14 different kinds of cookies one year.  But, as the kids get older and responsiblilties get more and I get older (can't stay up as late as I used to!!) , my baking isn't as much of a priority as it once was.  Kind of makes me sad, now that I think about it.
A couple of weeks ago I made some delicious chocolate chip cookie bars and I wanted to share the recipe with you.  Hopefully, in the next couple days I will be doing some baking- we have some more family coming next week for Christmas.  I am so excited!!!


In large bowl, combine brown sugar, white sugar, butter and shortening; beat til light and fluffy.

Add egg and vanilla.


Blend well. 

Add flour, baking soda and salt,; mix well.


Stir in chocolate chips.  I used the chocolate chunks for something a little different!


Spread dough in ungreased 13x9.  Bake at 375 for 15-25 minutes or until light golden brown.  Cool completely and then cut into bars.  (I doubled the recipe so we could have some for our trip up north and also V's class party.)

Mmmm, don't these just look sooo good!!

Chocolate Chip Cookie Bars
3/4 c. brown sugar
1/2 sugar
1/4 c. butter, softened
1/2 c. shortening
1 1/2 t. vanilla
1 egg
1 3/4 c. flour
1 t. baking soda
1/2 t. salt
1 c. (or more!) semisweet chocolate chips

Heat oven to 375 degrees.  In large bowl, combine brown sugar, sugar, butter, shortening and beat until light and fluffy.  Add vanilla and egg, blend well.
Add flour, baking soda and salt; mix well.  Stir in chocolate chips.  Spread dough in ungreased 13x9 inch pan.  Bake at 375 for 15-25 minutes or until light golden brown.  Cool completely.  Cut into bars.
Enjoy!!

Thursday, December 2, 2010

Thanksgiving 2010

I will never forget Thanksgiving 2010- it was a memorable one for sure!  We had a great week back in Minnesota with family and friends but the visiting was cut waaaay short because of the flu.  Over the course of the week everyone got it except V (who had it before we left) and my dad.  Sadly, many of the friends we were going to visit never saw us.  And I didn't get to visit with my sister and neice as much either but it did make me extremely grateful for the few days we were healthy!
On a different note, I am very thankful that I live in a state where there is no snow!!  I thought it would be hard to decorate for Christmas without snow but so far- I am loving it!  Maybe because I had my "snow fix" while we were up north.  :)  It is much easier to get around down here and it is fun to go outside in December in a sweater and no coat, mittens, hat and boots!  Something rare in Minnesota!

All kidding aside, I wanted to share with you my Thanksgiving day.

My beautiful daughter and sister

Sara and precious Evie


Andy and V waiting for the food to be done!  :)


The most amazing and beautiful sister anyone could ever ask for!!!


My brother Brad hard at work carving the turkey.  Good job Brad!


My mom is the bread baker in the family and normally she makes it for our dinners.  This year she let me and I made my delicious honey glazed rolls.  They were sooo good!  And she made this delicious salad!

Our Thanksgiving dinner.  Mmm- I'm hungry right now just looking at it!  Twice baked potatoes, salad, rolls, turkey and gravy, sweet potatoes and cornbread dressing.


And what Thanksgiving meal isn't complete with mom's homemade apple and pumpkin pies??!!

I hope you enjoyed a peek into my Thanksgiving and that you all had a wonderful and blessed one too! 


Saturday, November 13, 2010

A sweet tooth continued

V loves to have a snack after she comes home from school- she says she is SO hungry!  So I like to have a snack waiting for her but sometimes I'm not on top of it as I would like to be as far as having something homemade.  Yesterday after I picked her up I asked her if she would like some muffins.  She said YES so as soon as we got in the house I got right to work and made some for her!  Of course I went to my favorite cookbook- yep, you guessed it- 'The Pioneer Woman Cooks'!!!!!  Someday I have got to meet that woman. 
Which reminds me- want to take a trip with me to a blast from the past?  Well I hope so because we are goin' there! I always had a dream of going to a taping of the Oprah show.  I would call and call and never get through for tickets.  My dad lives in Chicago so I got the bright idea of asking him to try and call also.  Lo and behold- he got through right away!!!!! WHAT'S up with that???  Oh well, I didn't care at that point.  He GOT ME TICKETS!  For those of you who know me well, you can just imagine how loud I screamed when he told me that.  (My sister nicknamed me "the excinator"- I tend to get a LITTLE excited about things!)  Oh My Goodness- I was going to the Oprah show!!!!!  My sister, bless her heart, was living in Ohio at the time and she met me there so we went together.  It was a dream come true.  But not for my sister though-  thankfully she put up with me.  M my oh my- do we have stories to tell from that trip!  Anyway, back to my point- I always wanted to meet Oprah and thank the Lord it happened.  So, now I have to work on meeting Ree Drummond.  Oh, I can't wait to blog about when that happens!!! 
Ok, let's get back to V and her muffins.  So, I got out my fav cookbook and went to work!  I promise you will like these as much as we did- I hope you try them out!  I have made these out of my Betty Crocker cookbook before but I thought I would try hers.  I should compare the two recipes to see if they are different- maybe someday I will.  Anyhoo- here it is.

French Breakfast Puffs

3 c. flour
3 t. baking powder
1 t. salt
1/2 t. nutmeg
1 c. sugar
2/3 c. shortening
2 eggs
1 c. milk

Coating:
2 sticks butter (I used only 1 and had plenty!)
1 1/2 c. sugar
3 t. cinnamon


Preheat oven to 350 degrees and lightly grease 12 muffin cups.  Then, in a large bowl stir together the flour, baking powder, salt and nutmeg.  Set aside.

In a mixing bowl, cream together the sugar and shortening.

Now add the eggs and mix again. 

Alternate adding 1/3 of the flour mixture and 1/3 of the milk to the creamed mixture, beating well after each addition.


Fill the muffin cups 2/3 full.  Did you notice my square muffin pan- isn't it just so fun!  Chad and V gave it to me as a Christmas gift last year and I just love it!!
Now bake then for 20-25 minutes, until golden.  Remove the muffins from the pan and set aside.


Remember the 2 (gulp) sticks of butter??  Now you have to melt them in a bowl and stick your warm muffins in it.  Oh my- I just noticed I took a picture of 1 of the 3 round muffins I made- how funny is that!  Especially after I made a big deal of my square muffin pan!  I had more batter after filling up the squares so I put the extra in round muffin tins.  Too funny  :)


Now roll them around in a separate bowl filled with the delicious cinnamon/sugar mixture.  Mmm, that looks soooo good, doesn't it!!


Now while they are still warm, call a friend and invite them over.  Tell them you just made something delicious and you just had to share this moment with them!  They'll love you for it!  Enjoy!!


A sweet tooth

This week I must have had a sweet tooth (at least more than normal)- my family got quite a few sweets!  On tuesday night, Chad had to work until 1am so the girls and I brought him dinner at work and that was kind of fun!  It was hard to say good-bye after dinner knowing he had to go back to work for the rest of the night- but Biggest Loser was on at home and it was calling us!  No, really, Chad's dinner break was over and I had a pile of dishes waiting for me in the kitchen. I had been in the kitchen for 3 hours baking dinner and a dessert, feeding the girls and then running off to bring it to Chad.  I still had a full night ahead of me of cleaning and putting them to bed!
For dinner, I made calzones out of 'The Pioneer Woman Cooks' cookbook.  Chad said we have been eating really good every night this week since I have been using it but I can't help it- I just LOVE that book!!  If you want the recipe for the calzones (which were REALLY good) email me and I will post it.  Ree Drummond calls them Cowboy Calzones because she said "they are really good to feed to hungry cowboys on their way out the door"! I figured it was a perfect thing to serve Chad while he sat in the truck with us eating his dinner!  :)
For dessert I made LIBBY'S Pumpkin Roll and it turned out really good.  It was pretty much my first time making something like this so I did learn a few things.  Like when it tells you to sprinkle a thin, cotton kitchen towel with powdered sugar- it means HEAVILY sprinkle a thin, cotton kitchen towel with powdered sugar.  Otherwise the cake will stick to the towel and it will be harder to take it off!!  And when you are greasing your wax paper- make sure you grease up the sides of it too or the cake will stick to it!  Other than that- it was a "piece of cake" to make!!  Sorry- just couldn't pass that up.  :)

lIBBY'S Pumpkin Roll

1/4 c. powdered sugar (to sprinkle on the towel)
3/4 c. flour
1/2 t. baking powder
1/2 t. baking soda
1/2 t. cinnamon
1/2 t. cloves
1/4 t. salt
3 large eggs
1 c. sugar
2/3 c. LIBBY'S 100% pure pumpkin

Filling:
1 pkg. (8 oz.) cream cheese at room temp.
1 c. powdered sugar, sifted
6 T. butter softened
1 t. vanilla
Powdered sugar (optional for decoration)

Preheat oven to 375.  Grease 15x10 jelly roll pan; line with wax paper.  Sprinkle a thin, cotton kitchen towel with powdered sugar. See note above!  :)
Combine flour, baking powder, baking soda, cinnamon, cloves and salt in small bowl.  Beat eggs and sugar in large mixer bowl until thick.  Beat in pumpkin.  Stir in flour mixture.  Spread evenly into prepared pan.
Bake for 13-15 minutes or until top of cake springs back when touched.  (If using a dark colored pan, begin checking for doneness at 11 min.)  Immediately loosen and turn cake onto prepared towel.  Carefully peel off paper.  Roll up cake and towel together, starting with narrow end.  Cool on wire rack.
For filling: Beat cream cheese, 1 c. powdered sugar, butter and vanilla in small mixer bowl until smooth. Carefully unroll cake.
Spread cream cheese mixture over cake.  Reroll cake.   Wrap in plastic wrap and refrigerate at lease one hour.  Sprinkle with powdered sugar before serving, if desired.


Enjoy!!


Tuesday, November 9, 2010

Turtle Fudge Chocolate Chip Cookies

My wonderful neighbor brought us a plate of delicious, warm out of the oven cookies last week.  Thankfully she brought the recipe with her because I would've called her up and asked her for it!
It is too good not to share with all of you!!!

Turtle Fudge Chocolate Chip Cookies
5 oz. unsweetened chocolate
1/4 c. butter
1 (14 oz.) can sweetened condensed milk
1 (7.4 oz.) pkgs. Martha White Chocolate Chip Muffin Mix 
2/3 c. chopped pecans (if you want to)
48  Hershey's kisses- caramel  (I used mint and they were delicious!!!)

Heat oven to  350 degrees.  Coat large cookie sheet with no-stick cooking spray. 
Microwave chocolate and butter in uncovered large microwave-safe bowl on HIGH for 2 minutes or til butter is melter.  Stir until chocolate is completely melted and smooth.  Stir in sweetened condensed milk.  Stir in muffin mix until completely blended.

Roll tablespoonfuls of dough into balls.  Dip bottoms into pecans (if using).  Place on cookie sheet with nut side up, 2" apart.  Bake 9-10 min. or just until cookies looked slightly cracked and centers are still soft.  Immediately press a caramel candy into center of each cookie. 

Place on wire rack.  Swirl chocolate gently with knufe while candy is warm, if desired.  Cool.

I had the pleasure of making these with a houseful of neighbor kids in my house plus Chad.  I added him because he is as bad as the kids if not worse!!  They couldn't wait to eat some so when they were ready, I put some on a plate and sent the kids outside.  Chad kept sneaking in the kitchen and taking them off the cooling rack!  He LOVES his cookies so it was fun to bless him with those.  I have to say, they did not last long in our house though!  I wasn't able to bring any to my neighbor as a thank you- I'll have to do that next time.  So, in advance, thank you Debbie!!!


Mmmm- don't these look good. 
Enjoy!!
  

I think the best pizza ever!!

My last post had a recipe out of 'The Pioneer Woman Cooks' cookbook and this next recipe is also!  It is such a delicious and easy pizza crust/pizza recipe- I really hope you copy this down and make it.  You won't be sorry you did!!!
I have to confess that V wasn't too particularly fond of potatoes on her pizza and before it went into the oven, Chad did stand over the pizza pan and ask rather hesitantly what kind of pizza he was going to be eating.  But after he ate it- he said it was really good.  I TOTALLY loved it but V didn't want me to make it again.  Oh well, next time I will make a pepperoni for her and this for Chad and I. I usually DO NOT make separate meals (I only make one dinner and that is what we are eating!) but in this case, I can easily make her a different pizza and that means more for us.  :)

Back in Mn, I used to buy pizza dough from Trader Joe's but since I don't have one here (sob sob) I will be making my own.  This is my first time and it was SO EASY and so delicious!!! 

Pizza Crust
Makes 2 pizza crusts

1 t. or 1/2 packet of dry yeast
4 c. all-purpose flour
1 t. salt
1/3 c. olive oil, plus more for drizzling


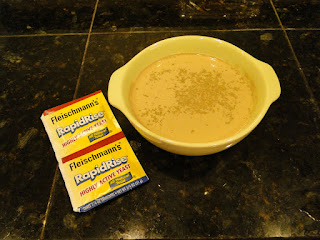
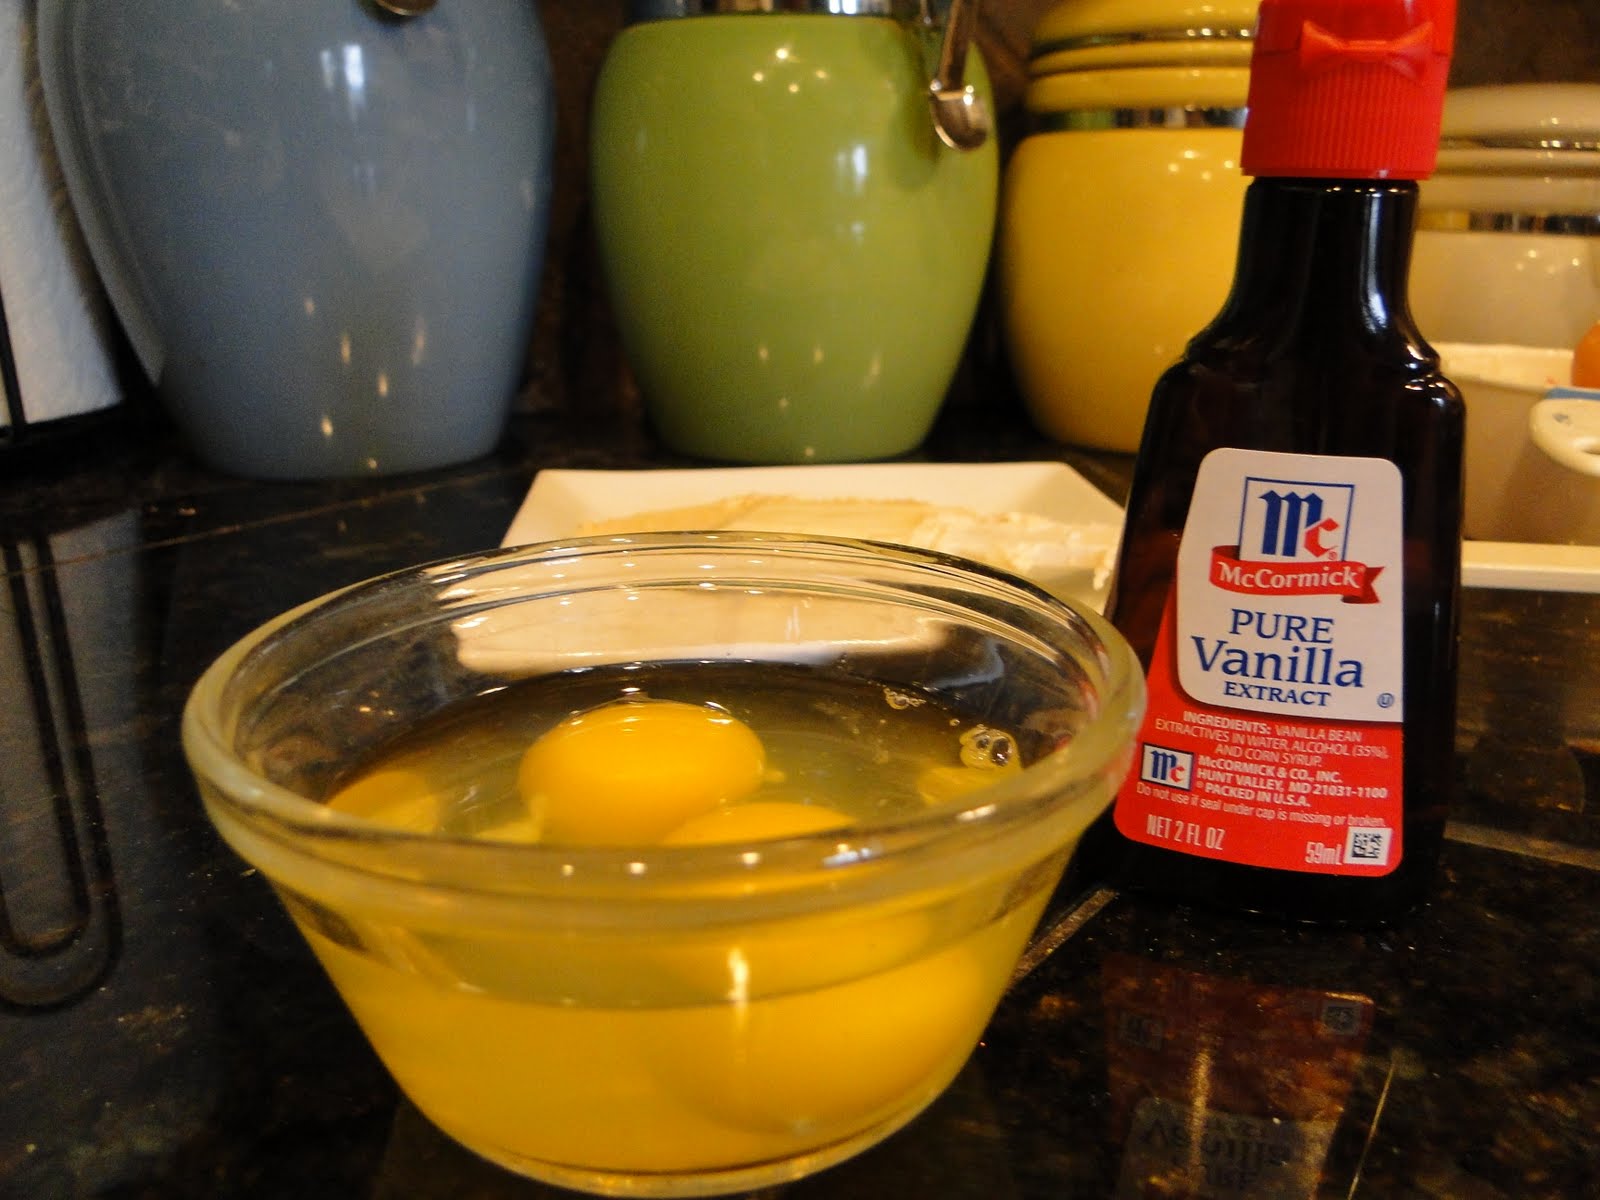
First, pour 1 1/2 c. warm water into a bowl and sprinkle the yeast over the water.  I usually avoided yeast because of this exact step- I was afraid of getting the water too warm but I didn't worry this time and it worked like a charm!  I was so impressed.  :)

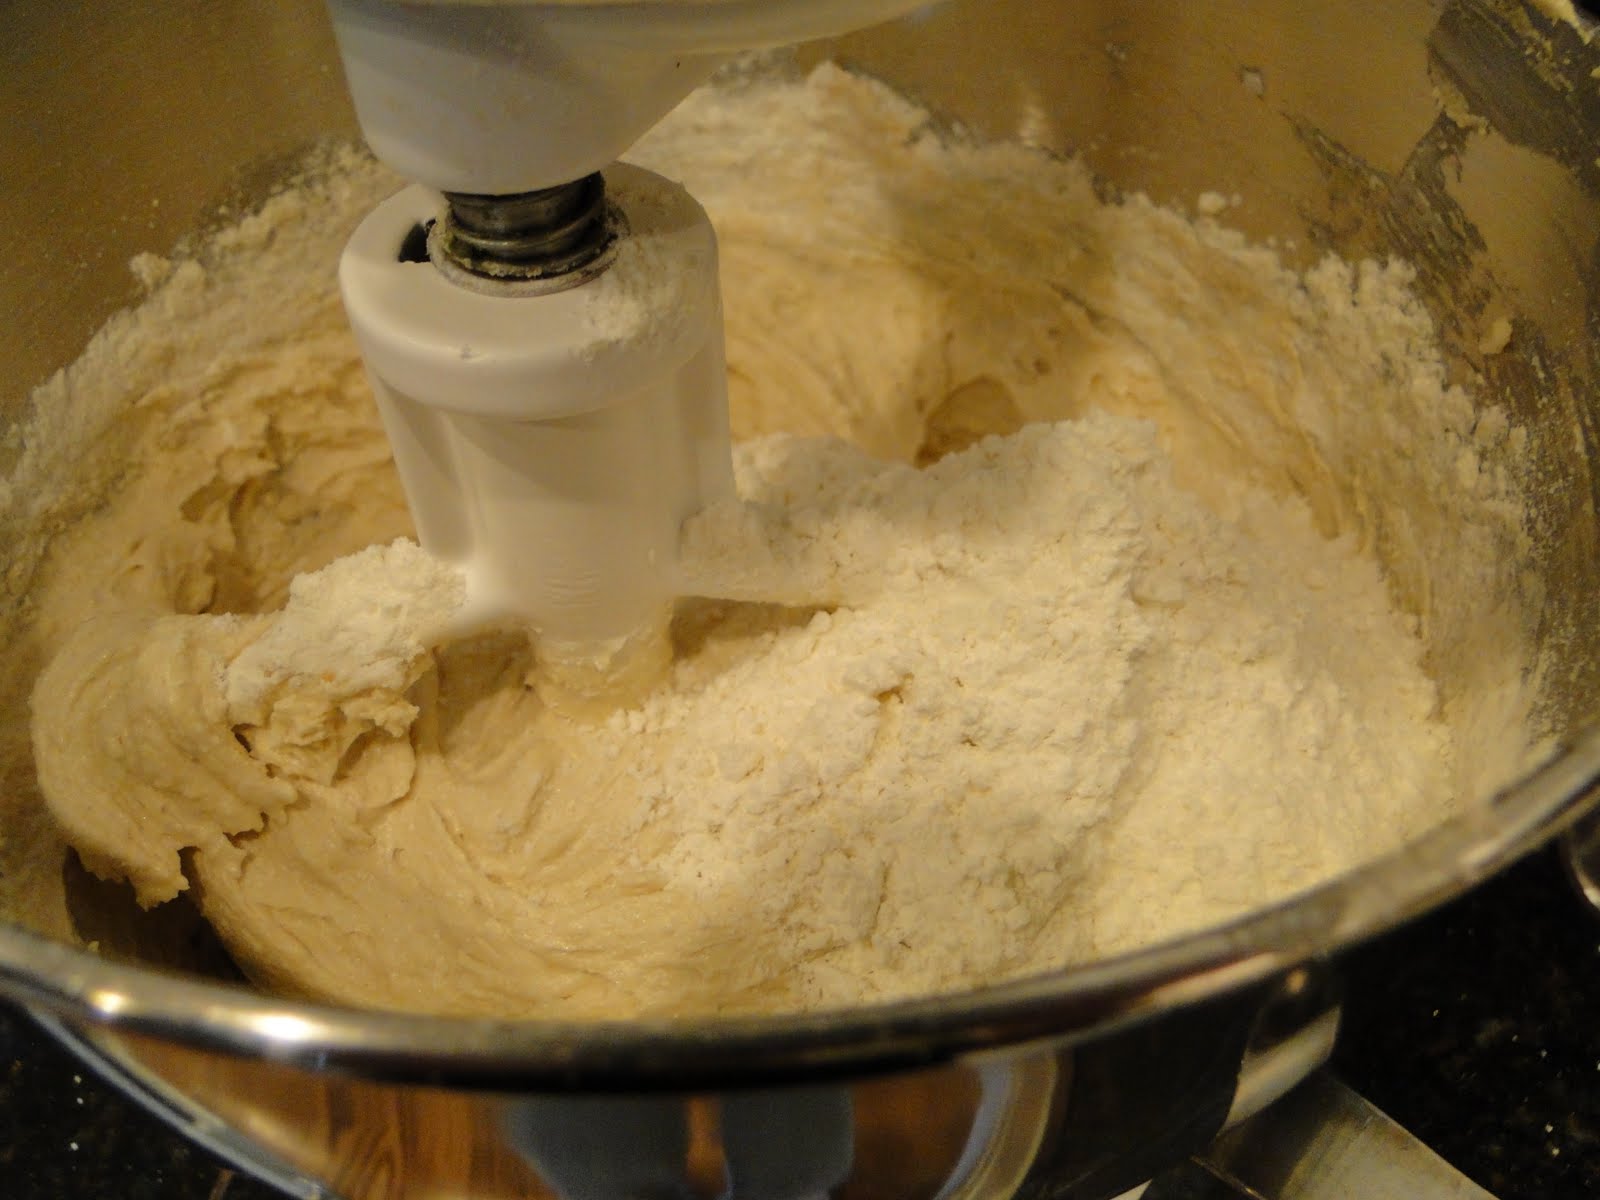
Next, combine the flour and salt in a mixing bowl.  It was so easy to do it in my Kitchen Aid.  I was getting really excited at this point- I kept telling myself I was making real homemade pizza crust!!

With an electric mixer on low speed, drizzle in the olive oil until just incorporated. 

After you poured in the olive oil, you are supposed to gently stir your yeast/water mixture and now drizzle it into the flour/oil mixture; mix until the dough forms a ball.  (You can also mix by hand until the dough comes together.)

Now drizzle a little olive oil into a clean bowl.  Toss the ball of dough in the bowl and turn over to coat in oil.  Cover the bowl with a moist kitchen towel and set in a warm place for 1-2 hours, or cover in the fridge for up to 2 days.  (I put mine in the oven for 1 or so hours and it was perfect!)  DON'T TURN THE OVEN ON!!  :)


 I happened to be making this when V was in school and H was sitting at my feet in the kitchen.  Poor thing, she had a runny nose though- note the shiny nose!  Still, she looked so adorable.  

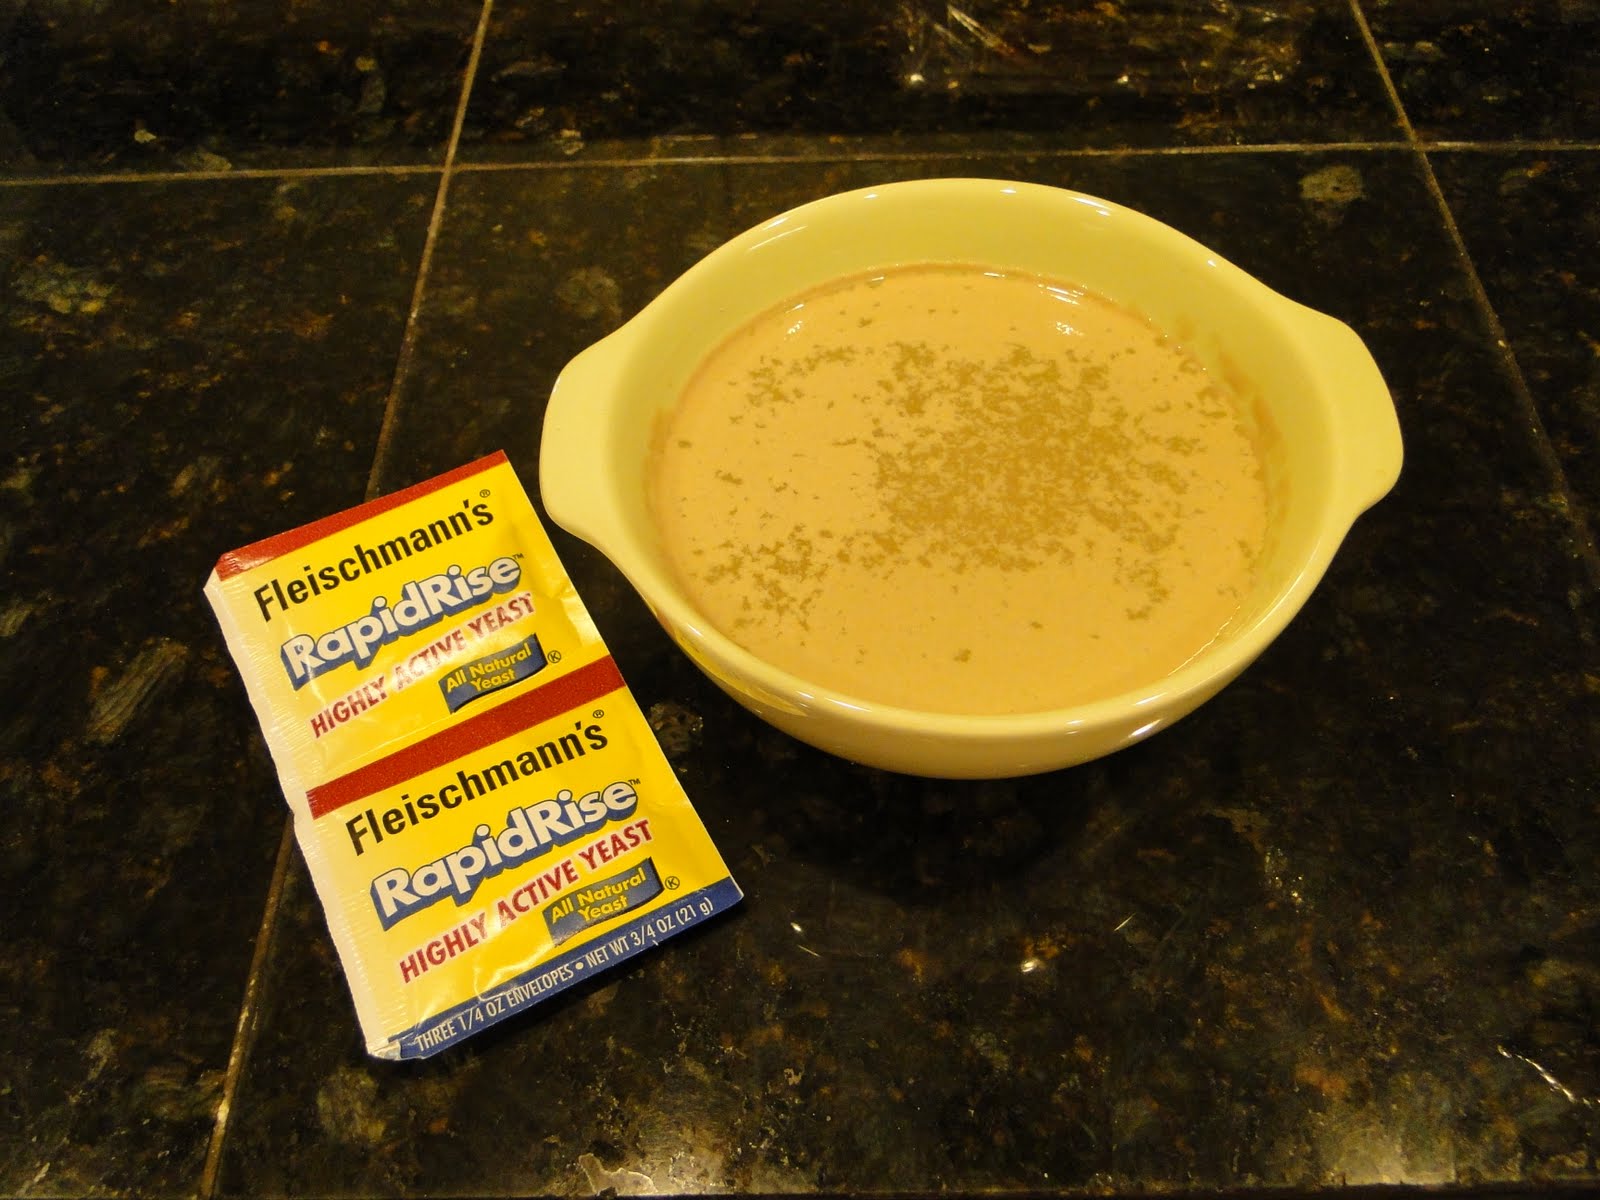
 Check this out- it raised exactly like it was supposed to!  I can't believe it did it!  :)  Since I used to be "yeast challenged"- this was quite a big deal.  And as a side note- my mom bakes many many of loaves of bread and rolls almost every Saturday so I didn't get my "yeast issues" from her!!  Love you Mom!!!!!!!


Now, for the "to die for" pizza.  This was unbelievable- I hope you try it!!!!!


Potato-Leek Pizza

!/2 recipe of Pizza Crust (see above)
Olive oil
Salt
6 slices thick cut bacon, cut into 1" pieces
3 leeks, rinsed well to remove grit and thinly sliced  (I forgot to buy them so I used an onion, and fried it up in a little bit of bacon grease and added some salt and sugar- soooo good)
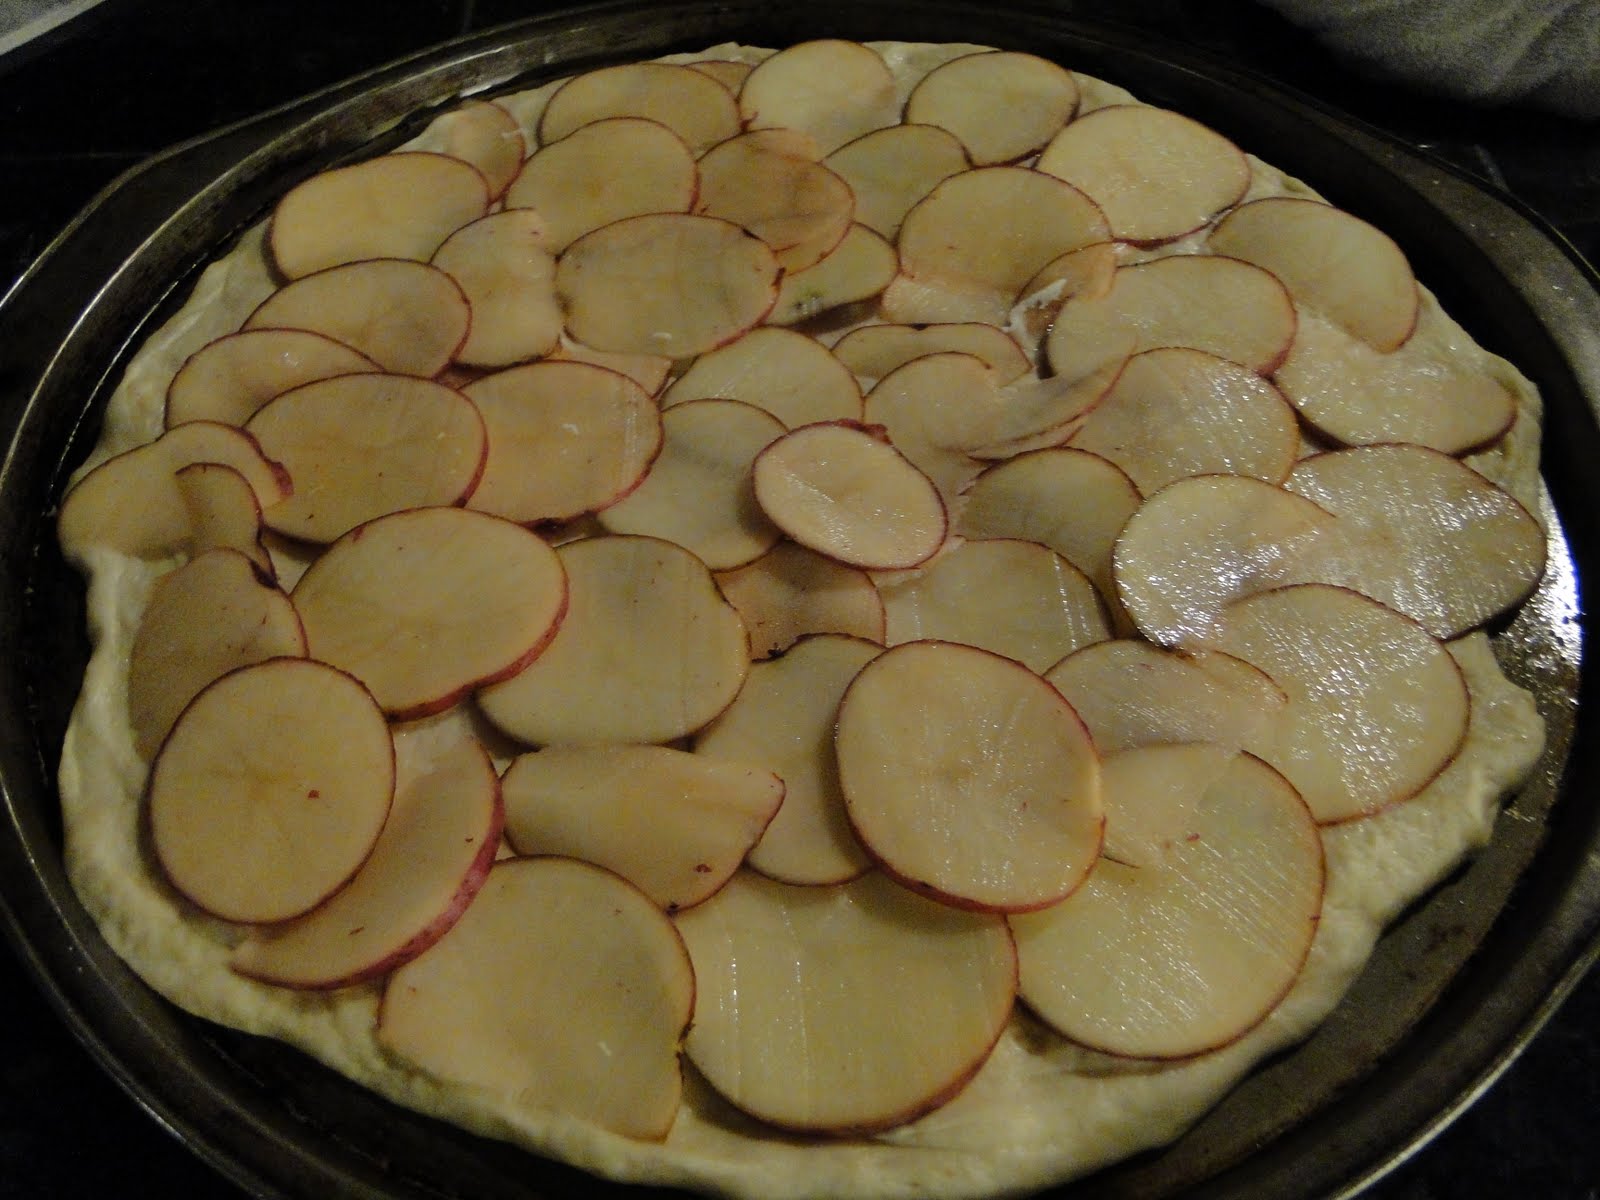
5 small red or Yukon Gold potatoes, sliced paper thin
1 lb. fresh mozzazrella cheese, sliced thin
4 oz. goat cheese, crumbled  ( I didn't use it and it was excellent but if you like it- go ahead!)
Grated parmesean cheese
Freshly ground black pepper

Preheat oven to 500 degrees. 
Prepare the pizza crust and drizzle lightly with olive oil.  Sprinkle lightly with salt. 
Begin by placing the bacon in a skillet over med. heat.  Fry the bacon until cooked but not crisp.  Note- The Pioneer Woman lives and works on a huge ranch and gets way more excercise than I do! I, in turn, do not. I may get my 30 min. a day in walking or running but that's pretty much it!  :)   So, in order to cut down on the grease and fat, I baked my bacon in the oven on a rack and just used a little of the bacon grease to fry the onions- for added flavor.  You may do it however you want! 
Remove the bacon and set aside.  Pour off most of the grease.  Do not clean the skillet.  Return the skillet to the stove and turn the heat to medium-low.  Add the leeks to the pan (or onions) and saute over med-low heat until soft, about 3 minutes.  Remove from the heat and set aside. 


Using a sharp knife or mandoline, slice the potatoes very thin.  You'll need to do this just before you need them, as the potatoes will brown very quickly.


Arrange the potatoes in a single layer all over the crust, slightly overlapping the edges.  I remember eating potato pizza at the Minnesota State Fair and really liked it so I was eager to try this recipe!  Sprinkle the potatoes lightly with salt, then lay the mozzarella slices in a single layer on top of the potatoes.


Place the leeks (or onions) on top of the cheese.  The flavor of the leeks (or onions) sauteed in bacon grease is not to be believed!


Next,sprinkle the fried bacon pieces over the top.  Followed by a generous addition of crumbled goat cheese (if using) and grated Parmesean, and a sprinkle of freshly ground black pepper.


Bake for 8-11 minutes, until the edges of the crust are golden brown and the cheese is melted and bubbly.  We tried it right after it came out of the oven but when we went back for seconds about 10  minutes later- the flavors were even more intensely delicious.  I would suggest waiting the 10 minutes or so- you won't be sorry you did!!!!  Please, please try this recipe.  It is sooooo good.  Did I already say that?  :D  Enjoy!!!!!


Ok, this is a pretty lame picture of this pizza but while I was trying to take pictures, Chad was calling to me from the table "can you please just stop taking pictures and come over here so we can eat!".  So, this is the only picture I took and then went to eat.  Gotta love "em!!!